
4
21. Do not place any objects on the device.
22. The device can be used only with properly working ventilation.
BEFORE FIRST USE
ASSEMBLY
Take the device out of the packaging. Assemble the base (4) in 2 steps (picture C):
Step 1: First, insert the base's latch into the square hole (Figure C1).
Step 2: Align the four bolt holes of the assembled base (4) with the hull bolt posts and lock the fuselage and base with the 4 self-tapping
screws (Figure C2). At the same time, lock the two screws securing the base and place the product in the right direction.
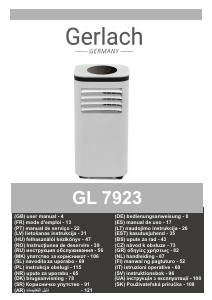
PRODUCT DESCRIPTION – TOWER AIR COOLER GL7927 – picture A
1. Handle 2. Control panel
3. Air outlet 4. Base
5. Filter 6. Screw
7. Cover with net 8. Water tank
9. Power cord 10. Water level indicator
11. Pump 12. Plastic containers
13. Water tank lock 14. Remote control
15. Brackets
Remote control & Control panel – picture B
A – power button
B – speed button
C – oscillation button
D – mode button
E – timer button F - wet cooling button
USING THE DEVICE
A noticeable reduction in the temperature of the outlet air occurs after putting into the water tank (8) the plastic containers (12) attached
to the product. The plastic containers should be previously frozen in the freezer for few hours. It is recommended to fill the plastic
container (12) with cold tap water and do not exceed MAX level marked on the plastic container. The content of plastic container is
prohibited to edible. Keep away from children.
1. Place the unit on a dry, flat surface.
2. Rotate to flat position the watedrain
r tank lock (13) and pull out a little the water tank (8) from the back of the device. Use the jug to pour clear, cold water, be careful not to
exceed the maximum level. You can pour water w/o pulling out the water tank completely. To remove water tank completely, first remove
the pump (11) by releasing thw two black brackets (15) and pull out the water tank (8). After water pouring, turn the water tank lock (13)
to horizontal position. Do not tilt the device after pouring the water to water tank. Do not remove water tank while the device is plug in
power supply.
3. Connect the plug to power supply, the device is in standby mode. The LCD display showing ambient room temperature is illuminated.
Now can be used control panel (2) or remote control (14) to operate the device (figure B).
Turn on the device using the power button (A). The device starts working in middle speed. Press the button (A) again to switch it back to
standby mode.
4. The button (B) allows you to change the speed of the fan. The following speeds can be selected: fast, medium and slow. The
corresponding icons on the panel will light up.
5. The wet cooling button (F) lowers the temperature of the air by running the water pump. Press the button (F) when there is water in
water tank ONLY. Additionally, a set of two plastic containers (12) is attached. Plastic containers (12) should be filled by cold, tap water
and do not exceed maximum level. Next, put them on several hours inside the freezer. Then put one or both of containers into water
tank (8). To blow the wet cool air, the device must be filled with water. When the device is operating, periodically check the water level to
see whether to add water. Press button (F) again to turn off the wet cold air blowing.
6. Pressing the oscillation button (C) starts the oscillation of device that provide even distribution of cold air stream in range 55° in left
and right direction. The corresponding indicator turn on.
7. The TIMER button (E) allows for programming the amount of operation time with 1 hour decrements from 1 to 8 hours.
8. The MODE button (D) allows for changing between one of 3 blowing modes:
normal wind, nature wind and sleep wind.
a) Normal Mode: allows the user to manually adjust the speed of fan between high, medium and low. Each time the fan is turned on it will
start operation on normal mode.
b) Nature Mode: mimics the natural wind action by repeating the fan speed sequence:
* When choose the low fan speed: the fan will blow 5 seconds at low speed and then switch off for 5 seconds, this cycle will be repeated
again and again.
* When choose the middle fan speed: the fan will blow 5 seconds each speed: medium, low, medium, stop, low, medium, low, stop and
this cycle will be repeated again and again.
* When choose the high fan speed: the fan will blow 5 seconds each speed: medium, low, high, medium, high, low, high, stop and this
cycle will be repeated again and again.
c) Sleep Mode: was designed to use the effects of Nature Mode to fall asleep. It will gradually decrease the speed of the fan in 30
minute increments:
* When choose the low fan speed: the fan will run the same as low speed Nature Mode.
* When choose the middle fan speed: the fan will blow 30 minutes at medium speed Nature Mode then switch to low speed Nature


Приєднуйтесь до розмови про цей продукт
Тут ви можете поділитися своєю думкою про Gerlach GL 7927 Вентилятор. Якщо у вас є питання, спочатку уважно прочитайте інструкцію. Запит на інструкцію можна зробити за допомогою нашої контактної форми.