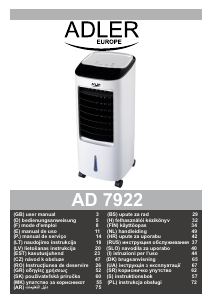
Посібник Adler AD 7922 Кондиціонер

Потрібен посібник для вашого Adler AD 7922 Кондиціонер? Нижче ви можете безкоштовно переглянути та завантажити посібник у форматі PDF українською мовою. Наразі цей продукт має 7 поширених запитання, 0 коментарів і 4 голоси із середнім рейтингом продукту 25/100. Якщо це не той посібник, який вам потрібен, будь ласка, зв’яжіться з нами.

Ваш товар несправний, а посібник не пропонує рішення? Перейдіть на Repair Café, щоб отримати безкоштовні послуги з ремонту.

Посібник

Loading…

4
21. Do not place any objects on the device.
22. The device can be used only with properly working ventilation.
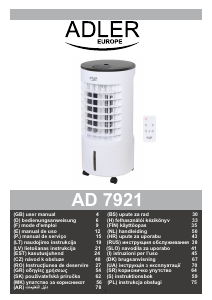
DEVICE DESCRIPTION (Figure A).
1.Control panel
2.Vertical louvers
3.Horizontal louvers
4.Wheels
5. Plastic containers
6. Inner filter
7. Air inlet cover
8.Water tank
9.Water tank lock
10.Remote control
BEFORE FIRST USE
Installation instructions for casters:
Take out the 4 casters from package. Turn the device upside down on flat surface with soft cloth or mat during assembling to prevent
scratches. Align the caster shaft with the caster installation hole in the body bottom and press firmly to the end. Look at figure C.
USING THE DEVICE
A noticeable reduction in the temperature of the outlet air occurs after putting into the water tank (8) the plastic containers (5) attached
to the product. The plastic containers should be previously frozen in the freezer for few hours. It is recommended to fill the plastic
container (5) with cold tap water and do not exceed MAX level marked on the plastic container. The content of plastic container is
prohibited to edible. Keep away from children.
1. Place the unit on a dry, flat surface.
2. Rotate to flat position the water tank lock (9) and pull out the water tank (8) from the back of the device. Pour clear, cold water, be
careful not to exceed the maximum level. You can pour water w/o pulling out the water tank completely. To remove water tank
completely, first remove the pump by pressing the two end tabs (figure D) and pull out the water tank (8). After water pouring, turn the
water tank lock (9) to horizontal position. Do not tilt the device after pouring the water to water tank. Do not remove water tank while the
device is plug in power supply.
3. Connect the plug to power supply, the device is in standby mode. The power indicator light is illuminated. Now can be used control
panel (1) or remote control (10) to operate the device (figure B). Turn on the device using the “ON/OFF” button (A). The device starts
working in middle speed and switches to low speed after 3 second. Press the button (A) again to switch it back to standby mode.
4. The SPEED button (B) allows you to change the speed of the fan. The following speeds can be selected: HIGH (fast), MIDDLE
(medium) and LOW (slow). The corresponding icons on the panel will light up.
5. COOL button (F) lowers the temperature of the air by running the water pump. Press the button (F) when there is water in water tank
ONLY, Additionally, a set of two plastic containers (5) is attached. Plastic containers (5) should be filled by cold, tap water and do not
exceed maximum level at first. Next, put them on several hours inside the freezer. Then put one or both of containers into water tank (8).
To blow the cool air, the device must be filled with water. When the device is operating, periodically check the water level to see whether
to add water. Press button (F) again to turn off the cold air blowing.
5. The COOL button (F) additionally lowers the air temperature by activating the water pump. Press the button (F) ONLY when there is
water in the water tank. The device is equipped with a set of two plastic containers (5). The plastic containers (5) must be filled with cold
tap water and not exceed the maximum level. Then put them in the freezer for a few hours. Next place one or both of the containers in
the water tank (8). water. While the machine is running, check the water level periodically to see if it needs add some water. Press the
button (F) again to turn off the water pump providing additional cold air blow.
6. Pressing the SWING button (C) starts the oscillation of horizontal louvers (3) that provide even distribution of cold air stream in range
60° in left and right direction. Vertical louvers (2) do not move automatically, so if necessary, manually adjust them to point up or down.
The corresponding indicator turn on.
7. The TIMER button (D) allows for programming the amount of time during which the device will operate before turning itself off
automatically, if the TIMER function is not used, the device will work until it is manually turned off. The turn off time can be set in half-
hour increments from 0,5 to 7,5 hours. There are 4 indicators: 0,5H, 1H, 2H and 4H. For example if the timer is set up for 3 hours, the
1H and 3H indicators turn on.
8. The MODE button (E) allows for changing between one of below tree fan modes NORMAL, NATURAL and SLEEP by repeating
pressing:
- The “NORMAL mode setting up:
“NORMAL” mode operation means blowing on one of chosen speeds:
H: HIGH FAN SPEED,
M: MIDDLE FAN SPEED,
L: LOW FAN SPEED
- The “NATURAL” mode mimics the natural wind action by repeating the fan speed sequence:
When choose the low fan speed: Air flow cycle: L(4seconds) -> M(6seconds) -> stop(2seconds -> L(6seconds -> M(10seconds) ->
L(4seconds) -> M(6seconds) -> stop(2seconds) -> M(2seconds) -> L(4seconds) -> stop(2seconds) -> L(10seconds) -> M(2seconds) ->
stop(4seconds) -> L(2seconds) -> M(6seconds) will be repeated again and again.
When choose the middle fan speed: Air flow cycle: M(6seconds) -> H(2seconds) -> L(6seconds -> M(8seconds) -> H(4seconds) ->
L(2seconds) -> M(10seconds) -> L(6seconds) -> M(8seconds) -> H(2seconds) -> stop(2seconds) -> H(4seconds) -> L(8seconds) ->
Завантажити посібник українською мовою (PDF, 4.14 MB)
(Бережіть природу: роздрукуйте цей посібник лише у випадку, коли це дійсно необхідно)

Loading…

Рейтинг

Дайте нам знати, що ви думаєте про Adler AD 7922 Кондиціонер, залишивши рейтинг продукту. Хочете поділитися своїм досвідом щодо цього продукту або задати запитання? Будь ласка, залиште коментар внизу сторінки.
Ви задоволені Adler AD 7922 Кондиціонер?
Так Ні
25%
75%
4 голоси

Приєднуйтесь до розмови про цей продукт

Тут ви можете поділитися своєю думкою про Adler AD 7922 Кондиціонер. Якщо у вас є питання, спочатку уважно прочитайте інструкцію. Запит на інструкцію можна зробити за допомогою нашої контактної форми.

Детальніше про цей посібник

Ми розуміємо, що добре мати паперовий посібник для вашого Adler AD 7922 Кондиціонер. Ви завжди можете завантажити посібник з нашого сайту та роздрукувати самостійно. Якщо ви бажаєте отримати оригінальний посібник, радимо зв’язатися з Adler. Вони можуть надати оригінальний посібник. Шукаєте інструкцію до свого Adler AD 7922 Кондиціонер іншою мовою? Виберіть потрібну мову на нашій домашній сторінці та знайдіть номер моделі, щоб дізнатися, чи є вона у нас.

Технічні характеристики

Бренд Adler
Модель AD 7922
Категорія Кондиціонери
Тип файлу PDF
Розмір файлу 4.14 MB

Усі посібники для Adler Кондиціонери
Більше посібників для Кондиціонери

Часті запитання про Adler AD 7922 Кондиціонер

Наша служба підтримки шукає корисну інформацію про товар і відповідає на поширені запитання. Якщо ви знайдете неточність у наших запитаннях та відповідях, повідомте нас про це, скориставшись контактною формою.

Як часто мені слід чистити або замінювати фільтри в кондиціонері? Підтверджено

Бажано перевіряти фільтри кондиціонера 4 рази на рік. Брудні фільтри можна чистити за допомогою пилососа або мити, в залежності від їх типу. Під час технічного обслуговування фахівець повинен визначити, чи пора замінити фільтри.

Це було корисно (2691) Читати далі

Що означає BTU? Підтверджено

BTU розшифровується як британська теплова установка. Це одиниця виміру, яка вказує на здатність охолоджуватися.

Це було корисно (959) Читати далі

Чи кожен кондиціонер також виконує функцію осушувача? Підтверджено

Холодне повітря, яке виробляє кондиціонер, часто має відносно низьку вологість. Однак ефект менший, ніж при використанні власне осушувача. Деякі кондиціонери мають особливу функцію осушення повітря.

Це було корисно (713) Читати далі

Що таке R-410A? Підтверджено

R-410A - це охолоджуючий засіб, який використовується в приладах, що охолоджуються до 0 ° C, таких як холодильники та кондиціонери. Це заміна старих охолоджуючих агентів і не пошкоджує шар озону.

Це було корисно (492) Читати далі

Яке найкраще місце для кріплення внутрішнього блоку спліт-кондиціонера? Підтверджено

Це залежить від простору, але загалом можна дотримуватися наступних правил. Переконайтесь, що нічого не заважає потоку повітря. Переконайтеся, що місце доступне для технічного обслуговування. Встановіть пристрій принаймні на 2 метри від землі.

Це було корисно (354) Читати далі

Чи можу я розмістити свій мобільний кондиціонер у шафі, щоб він не потрапляв у поле зору? Підтверджено

Ні, абсолютно ні. Мобільному кондиціонеру потрібен простір, щоб забезпечити потік повітря та надходження повітря. У невеликому просторі пристрій може перегрітися.

Це було корисно (352) Читати далі

Чи впливає кондиціонер негативно на якість повітря? Підтверджено

Якщо кондиціонер підтримувався належним чином, це не вплине на якість повітря. Якщо, наприклад, фільтр не замінювали протягом тривалого часу або не проводили іншого технічного обслуговування, кондиціонер може видавати брудне повітря.

Це було корисно (350) Читати далі
Посібник Adler AD 7922 Кондиціонер

Супутні товари

Пов'язані категорії